 Cut out 2 of these in each color. The Webbing fabric on top, the back
fabric underneath.
Cut out 2 of these in each color. The Webbing fabric on top, the back
fabric underneath.Now here comes the Sewing part. If you have no experience in Sewing, a glue gun will work as well. I personally find sewing to be more durable and longer lasting.
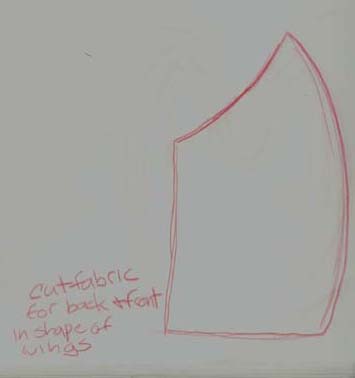
take the fabric you chose for the webbing and the back of the wings and place it under your wing frames. The frame will be your template for the shape of your wing skin. Cut out the fabric around the wing frame..you should get a shape roughly like this:
Cut out 2 of these in each color. The Webbing fabric on top, the back
fabric underneath.
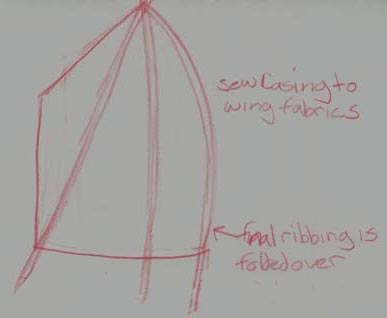
Then you'll want to cut more strips for casing out of the wing base fabric. They should be a bit longer than the ribbing on the frame work. After you get those cut out, sew (or glue) them to both the webbing and the back fabrics. to Sew this, you'll want to sew the edges on the casing to the fabrics, leaving the middle open (to slide the ribs of the frame work through). Leave the tops and bottoms open as well, and don't cut the castings off if they are too long. We'll get to that part later.
 The
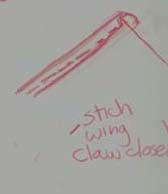
ribbing on the end of the wing is sewing differently. You'll place
the casing along the edge of the fabrics so you can sew it down, then
fold it over and sew that side down as well.
The
ribbing on the end of the wing is sewing differently. You'll place
the casing along the edge of the fabrics so you can sew it down, then
fold it over and sew that side down as well.
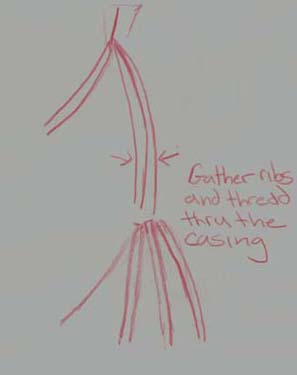
Now the tricky part..threading the ribs into the casing. This will take some time but don't give up! The best way to do this is to gather up the ribs and start them through the casing all at once. You might need two people for this to make it go faster (one to hold the ribs one to start the threading)